 Bellingham Roofing
 Building Windows Into a Sehome Home the Right Way, the First Time
New-construction window installation is a different job than swapping out an old window in an existing opening, and it's a job that either sets a house up to handle Bellingham's weather for decades or quietly sets it up for rot, mold, and callbacks within a few winters. In a neighborhood like Sehome — close enough to Bellingham Bay to catch salt-laden air, tucked into hillside lots with mature tree cover, and squarely inside Whatcom County's wet, gray, moss-friendly climate — the margin for error on window installation is smaller than most homeowners realize. This page covers what a correct new-construction window job actually involves here, what materials and glass packages make sense for this specific climate, and why it matters to hire a crew that has already worked this part of Bellingham.
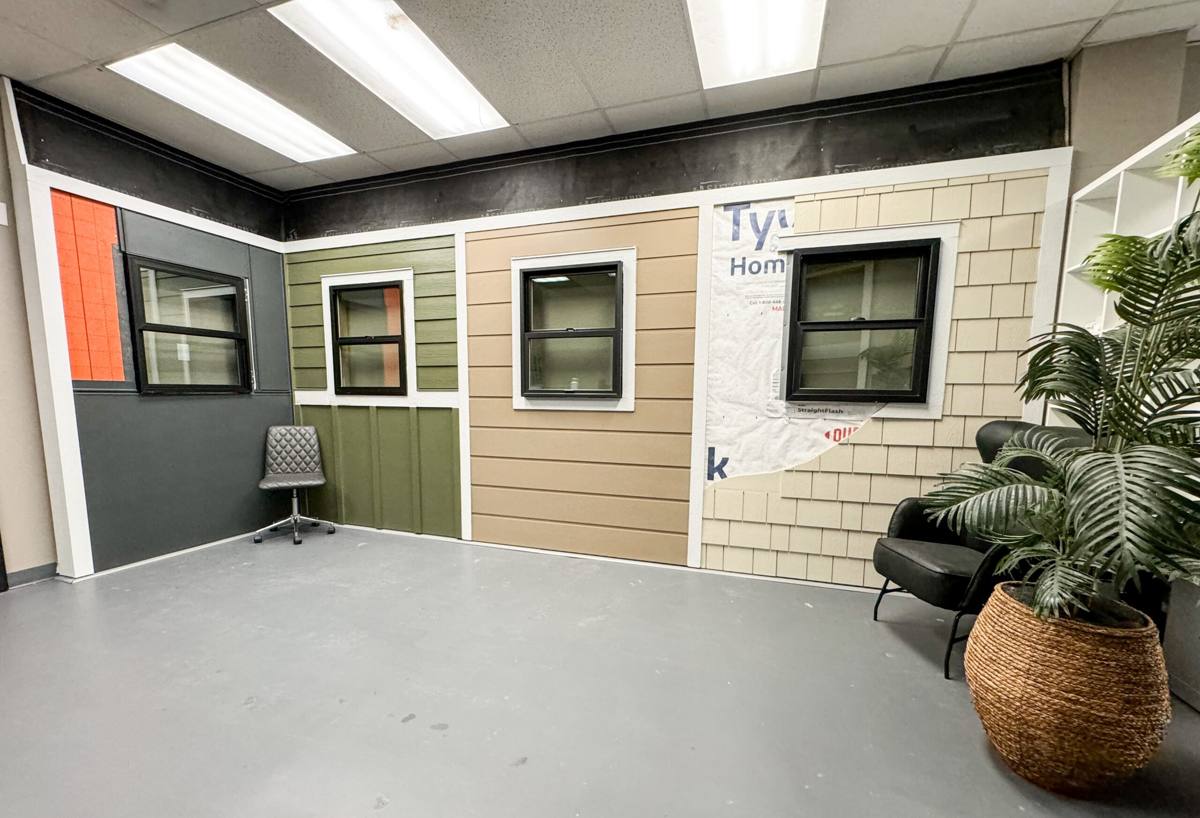
What "New-Construction Windows" Actually Means
New-construction windows are units installed with a nailing fin (or flange) directly into a framed rough opening, before siding and exterior finishes go on. They're the standard choice for new builds, additions, and any remodel where the wall is opened down to the studs and sheathing. This is different from a pocket or "replacement" window, which is sized to slide into an existing frame without disturbing the surrounding siding or trim.
Why the Distinction Matters in a Marine Climate
A new-construction install gives us full access to the rough opening, the water-resistive barrier (WRB), and the framing itself — which means we control every layer of the water management system, not just the window unit. In a climate that gets sustained, wind-driven rain off the Sound, that access is the whole point. It's the difference between a window that's watertight because the flashing was done in the correct order, and one that's only dry until the sealant ages out.
What Sehome Homes Actually Need From Their Windows
Whatcom County's climate isn't extreme in temperature, but it's persistent in moisture, and that's what wears on window assemblies over time. A handful of local realities drive how we approach every install:
- Wind-driven rain: Storms off the water push rain sideways against west- and south-facing walls, which stresses any weak point in flashing or sealant far more than a straight-down rain would.
- Salt air: Proximity to Bellingham Bay means airborne salt accelerates corrosion on exposed fasteners, hinges, and lesser hardware — a real factor in choosing window hardware finishes and fastener types.
- Moss and mildew season: Long stretches of damp, low-sun weather let moss and mildew establish on any surface that stays wet, including window sills, trim, and poorly ventilated frame cavities.
- Shaded, tree-covered lots: Many Sehome properties sit on sloped ground with significant tree cover, which limits sun exposure and drying time after a storm — surfaces stay damp longer than they would on an open, sunny lot.
- Condensation: Cooler indoor-outdoor temperature differentials for much of the year make glass selection and frame insulation value more than a comfort issue — it affects long-term moisture at the sill.
None of this means new-construction windows are a bad fit for the neighborhood — it means the installation details matter more here than they would in a drier climate, and cutting corners shows up faster.
The Anatomy of a Correct Installation
A new-construction window opening is built in layers, and each layer has to lap correctly over the one below it so water is always directed outward and downward — never trapped behind the siding. Skipping or reversing any one of these steps is the single most common cause of window-related water damage we get called out to fix.
- Rough opening checked for square, level, and correct dimensions before the window ever arrives on site
- Sill pan flashing installed to catch and direct any water that gets past the window back out, not into the wall cavity
- WRB (house wrap) integrated with the flashing in the correct shingle-lap order — side flashing, then head flashing, always lapped over what's below
- Window set plumb, level, and square in the opening, then fastened through the nailing fin per the manufacturer's schedule
- Sealant used at the nailing fin, not as a substitute for proper flashing — sealant is a backup layer, not the primary defense
- Shimming at structural points only, avoiding continuous shims that can block drainage or transfer stress to the frame
- Backer rod and sealant at the interior air seal, closing the gap between frame and rough opening without blocking the exterior drainage plane
- Insulation in the gap between frame and studs — not packed so tight it bows the frame, not left so loose it becomes a thermal and moisture gap
Materials and Glass That Hold Up Near the Bay
Frame material and glass package both affect how a window performs against salt air, driving rain, and the region's cooler, wetter months. There's no single "best" answer for every home, but here's how the common options stack up for this climate:
| Material | Moisture / Salt-Air Behavior | Maintenance | Typical Cost Range | Best Fit |
|---|---|---|---|---|
| Vinyl | Won't rust or rot; performs well in salt air | Low — occasional cleaning | Lower end of the market | Budget-conscious builds, rental additions, most standard new construction |
| Fiberglass | Excellent stability in temperature and moisture swings; very low expansion/contraction | Low | Mid-to-upper range | Larger openings, homes wanting a longer service life without much upkeep |
| Wood-clad | Good performance if the exterior cladding and flashing details are done correctly; interior wood needs protection from condensation | Higher — finish and seal maintenance over time | Upper range | Homeowners prioritizing an interior wood look who are willing to maintain it |
On glass, we generally steer Sehome homeowners toward a low-E coated, argon-filled double-pane unit with a U-factor suited to Washington's energy code for this region. The coating and gas fill do more for comfort and condensation control here than glass thickness alone — this is a damp, moderate climate, not an extreme-heat one, so the priority is managing moisture and heat loss, not blocking intense sun.
A Note on Product Choices
We don't push homeowners toward one manufacturer over another as a blanket rule. What we do insist on is a window rated for the exposure it's going into, installed to the manufacturer's specified flashing method — because a warranty on the unit itself doesn't cover water damage caused by a bad installation, and we've seen that distinction cost homeowners real money after the fact.
How the Job Actually Runs
- Rough opening review: We check framing dimensions against the ordered window sizes before install day, so there are no surprises once the crew is on site.
- Coordination with the build schedule: New-construction windows go in at a specific point in the framing-to-siding sequence. We work with the general contractor or builder to hit that window without holding up other trades.
- Flashing and sill pan installation: Done before the unit is set, in the correct lapped order with the WRB.
- Setting and fastening the window: Plumb, level, square, and fastened per the manufacturer's nailing schedule.
- Exterior sealing and head flashing: Completed so the drainage plane stays continuous.
- Interior air sealing and insulation: Closing the gap between frame and rough opening without compromising the exterior drainage layer.
- Final check: Every unit is checked for operation, square, and a clean seal before we sign off.
Mistakes We Catch on Job Sites
Most window-related water problems don't come from a bad window — they come from a rushed or out-of-sequence installation. The patterns we see most often:
| Mistake | Why It Fails in This Climate |
|---|---|
| Flashing lapped in the wrong order (head flashing under the WRB instead of over it) | Wind-driven rain finds the reversed lap and runs behind the barrier instead of over it |
| No sill pan flashing | Any water that gets past the window sits directly on bare sheathing instead of being directed back out |
| Sealant used in place of proper flashing | Sealant degrades with UV and temperature cycling; it's a backup layer, not a substitute for shingled flashing |
| Continuous shims blocking the drainage gap | Traps moisture against the frame instead of letting it drain and dry |
| Interior sealing done before exterior flashing is finished | Can trap moisture inside the wall cavity where it's invisible until rot sets in |
Cost Factors on a Sehome New-Construction Job
Every project is different, but the line items that most often move the price on a Sehome job are worth knowing going in:
| Factor | How It Affects the Job |
|---|---|
| Number and size of openings | More or larger openings mean more flashing, labor, and material |
| Frame material (vinyl / fiberglass / wood-clad) | Material cost and labor complexity both increase up the list |
| Glass package (standard vs. upgraded low-E/argon) | Affects unit cost and long-term energy performance |
| Site access on sloped or tree-covered lots | Hillside terrain common in Sehome can add setup time and staging complexity |
| Coordination with an active build | Working around other trades on a new-construction timeline can affect scheduling but not typically the install cost itself |
Why Local Experience in Sehome Matters
Whatcom County's inspection expectations, the way local builders sequence framing and dry-in, and the realities of installing on sloped, tree-shaded lots are all things a crew learns by doing the work here repeatedly — not by reading a manufacturer's install guide once. A crew that's already worked jobs in and around Sehome knows how to plan around the terrain, how to sequence with other trades on an active build without creating delays, and what level of exposure protection actually holds up through a Bellingham winter versus what looks fine on paper. That local pattern recognition is what keeps a new-construction window job from becoming a callback two years down the road.
If you're planning new construction, an addition, or a full remodel in Sehome and want windows installed correctly the first time, we're happy to walk the site, look at your plans, and give you a straightforward, no-pressure estimate using the form below.